Jam Filled Hand Pies : Gluten Free & Homemade
As an Amazon Associate and member of other affiliate programs, I earn from qualifying purchases.
Nothing makes me happier than homemade jam. This year, I finally made my own. While great on toast, it proved to be the perfect filling for gluten free blueberry jam hand pies. These will for sure put a smile on anyone’s face!
The Easiest Homemade Jam, Ever
I love blueberries. Which is ironic, because I didn’t until well into my 20’s. Maybe even my 30’s. I think it all changed once we started picking our own. Every summer, we make the 20 mile drive with friends to Montrose Orchards. It’s not uncommon for us to come home with ten pounds of berries.
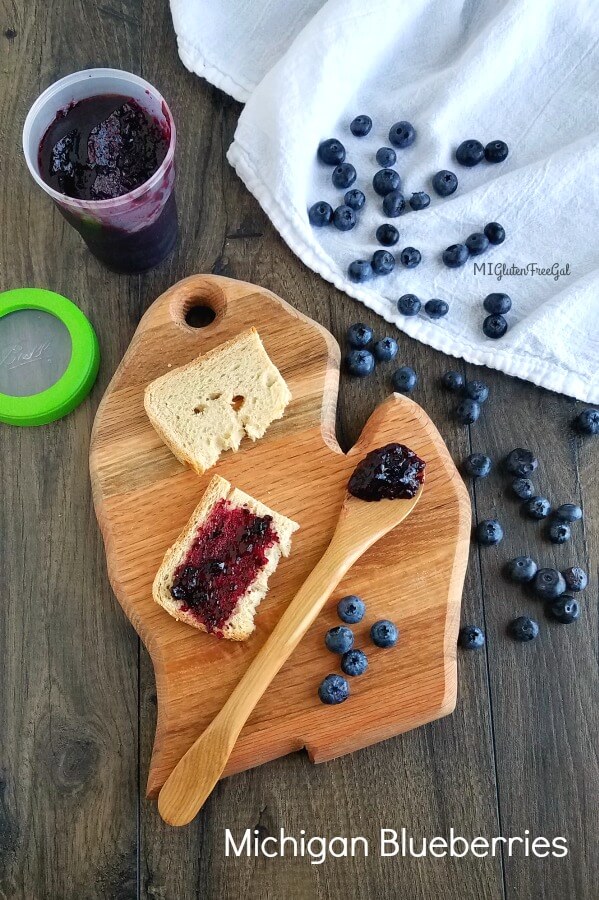
Every year I look to make something new. I’ve made blueberry pie, blueberry muffins, and even Blueberry – Cream Cheese French Toast Casserole. This year, I decided to make jam. I found THE easiest recipe for Blueberry Freezer Jam from She Wears Many Hats. My past failures at making freezer jam have been redeemed with this one recipe. I daresay it’s the best jam I’ve ever tasted. (I imagine you could use it to make strawberry or cherry jam, as well.)
Gluten Free Pie Dough
So now I have two containers of blueberry jam. It tastes wonderful on toast and delicious paired with peanut butter. However, I wanted to take things a step further. So I decided to make gluten free jam hand pies. (My, that’s a mouthful!) Perfect for breakfast, packed in school lunches, or a simple dessert.
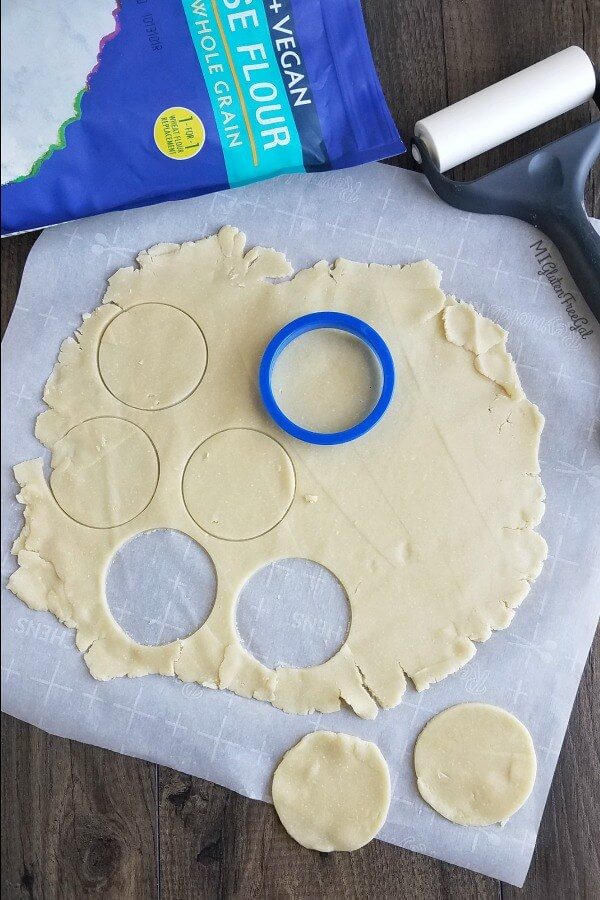
For the dough, I followed the pie crust recipe from Linda Fedewa’s Bake It Best Cookbook. (Everything I know about pies, I learned from her.) I used a Wilton 3 inch circle cookie cutter. Although now I want to try a Pampered Chef Cut N Seal, (affiliate link) after watching Eat At Our Table make Homemade Gluten Free Uncrustables!
Perfect Proportion of Filling for 3″ Hand Pies
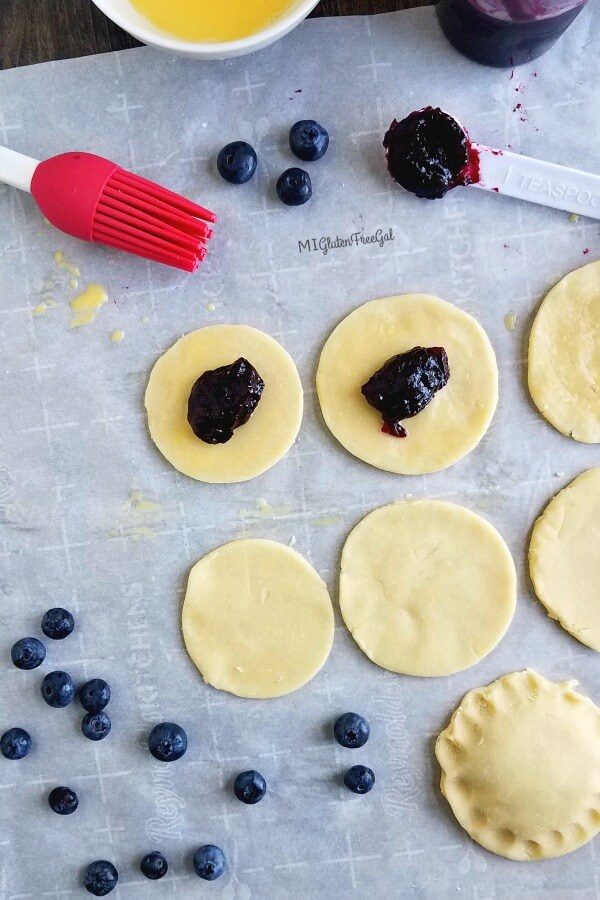
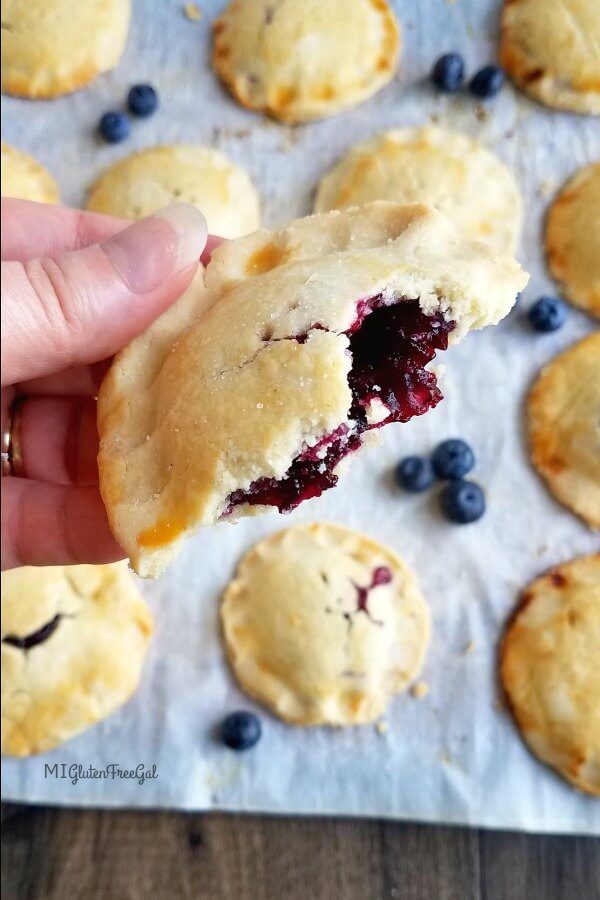
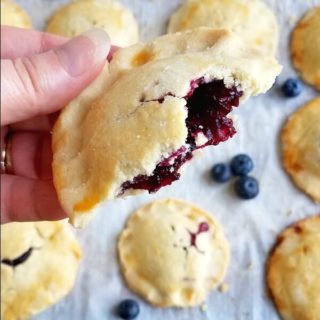
I prepared Linda’s gluten free pie crust recipe as directed. When I was finished rolling and cutting, I successfully created 26 circles. After reading various other jam hand pie recipes, I decided to brush each bottom crust with egg wash before adding the topping. On my first hand pie attempt I tried 1 tablespoon of filling. However, it was a mess to seal.
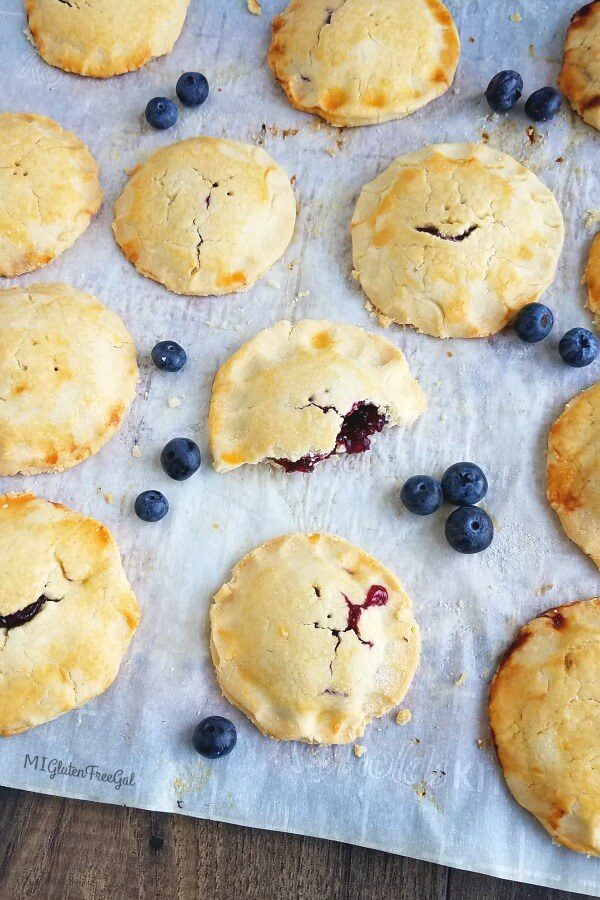
Therefore I decided to use only a teaspoon of blueberry jam on the next attempt. It placed the second crust on top of the first, and pinched it down with my fingers, creating indentations around my jam hand pies. It turned out to be the perfect amount of filling. Each finished hand pie is brushed with egg wash, sprinkled with sugar, and poked with a toothpick so steam can escape. This prevents blown out seams and exploding filling!
Can I Use Store Bought Jam?
Store bought jam should be fine to use. I would make sure to use jam versus jelly. As The Kitchn explains, jam still contains bits of cooked down fruit. Jelly, on the other hand, is made from fruit juice and is very thin. I fear that jelly would not hold up well in jam hand pies at all.
As for a brand of jam, choose what you like best. I think any of Bonne Maman’s preservers would work well in these gluten free jam hand pies as well. (They’re certified gluten free, too!) Use their blueberry preserves, or even try their peach or orange marmalade.
Hand Pies Vs. Pop Tarts Vs. Toaster Pastries
What’s the difference between the three? To be honest, I don’t think they’re all that different. The Wikipedia entry for “toaster pastry” includes a picture of the frosted Kellogg Pop Tarts most of us grew up eating. My gluten free jam hand pies contain no outer icing. So maybe that’s the difference. **Note – Don’t reheat these in the toaster!
If you are looking for the more traditional “pop tart,” I recommend giving this Giant Strawberry Pop Tart recipe from A Dash of Megnut a try. You can make it into smaller sections. Want something less sweet? Try my egg and bacon savory breakfast toaster pastry recipe. No sweet icing on top, but it’s great smeared with goat cheese!
Need a vegan recipe? Try the Vegan Berry Pop Tarts from Allergylicious!

The Bake It Best Cookbook
As I mentioned, everything I learned about baking pies I gleaned from Linda Fedewa. If her name sounds familiar, she owned A Piece of Cake in East Lansing for many years. After leaving the bakery, she sold her own proprietary gluten free flour blend and gluten free cookbook.
She no longer produces the flour. However, you can still order her Bake It Best cookbook via email. The cost is $25, and she will also include the recipe for making her flour blend. Linda is a phenomenal cake artist should you need a cake for your wedding or other event. She made my father’s 60th birthday cake and everyone adored it!
P.S. You Need This PB + J Spoon
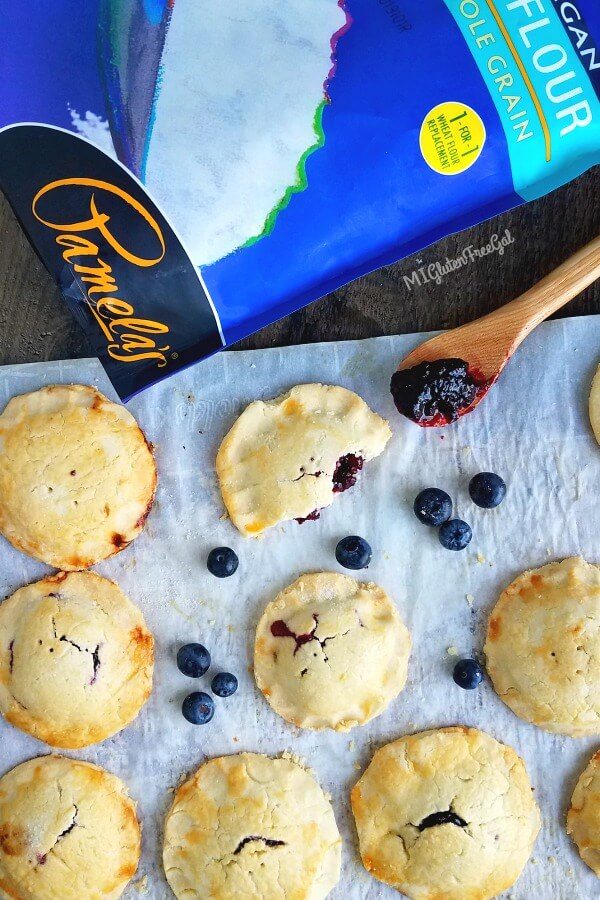
As mentioned, Linda no longer produces her flour. Therefore, I replaced her flour with Pamela’s Products gluten free artisan flour, and the crust worked out great. I again want to thank them for donating to our Michigan gluten free kids camp. This package of flour was sent to camp and I brought home the extra to play with.
Last but not least, I wanted to tell you about this WONDERFUL handmade wooden peanut butter and jelly spoon. It’s handmade by a lady I met at a craft fair. Her Etsy shop is Barden Woodworking. This creative spoon has a spreader on one end for nut (or seed) butter, and a spoon for jam. She makes Michigan shaped cheese boards, too!
Gluten Free Jam Filled Hand Pies
Equipment
Ingredients
For the Crust
- 1 1/2 cups gluten free flour I used Pamela’s
- 1/2 cup corn starch
- 1 tbsp granulated sugar
- 1/2 tsp salt
- 1 large egg
- 12 tbsp cold butter
- 2 tbsp ice water
For the filling
- Approx 12 tbsp of jam
- For homemade jam recipe visit She Wears Many Hats
- 1 egg whisked with 1 tbsp water for egg wash
- Sugar for sprinkling on top
Instructions
- In a food processor, blend together flour, cornstarch, sugar and salt. Pulse to combine ingredients until thoroughly distributed.
- Add egg to processor and pulse until combined, about 5-6 times
- Add 12 tbsp of cold butter, cut into chunks, to food processor. Pulse until mixture begins to take on a sandy texture and butter is distributed.
- Slowly add ice cold water, one tablespoon at a time, until a dough starts to form. Linda usually does only one tablespoon. I needed two.
- Remove dough from food processor and place onto a piece of parchment paper, sprinkled with a bit of flour. Knead dough until smooth and pliable. The heat from your hands will melt any bits of butter in the dough. (At this point the dough can be refrigerated to use later if needed.)
- Divide dough in half. Lightly dust your surface again with flour, and roll the first half of dough. Use a circle cookie cutter to cut your rounds for your hand pies. You should get 12-13 per dough half. Store in the fridge, and repeat with remaining half of dough. (Super cold dough helps in the baking process.)
- Once all circles have been cut and chilled, remove from refrigerator and prepare to fill the hand pies. In a small dish, whisk together one egg and one tbsp water to create an egg wash.
- Place half of the cut circles on a parchment lined baking sheet and brush with egg wash. These will be the bottoms of your hand pies.
- Next, place one tablespoon of filling on each bottom.
- Cover each topped circle with another circle of dough. Use your finger to press down around the other egg, sealing the dough circles together. Repeat until all bottoms have tops.
- Brush the tops of the sealed hand pies with egg wash, and sprinkle with sugar. Use a toothpick to pierce two or three holes in the top of each hand pie. This allows steam to escape and prevents the seams from splitting.
- Return hand pies to fridge while preheating oven to 350 degrees.
- Once the oven is heated, bake hand pies for 25-30 minutes. I find it best to rotate the pan 180* halfway through cooking.
- Once finished baking, allow to cool to room temperature. You can add a simple glaze if you like, but I find these to be delicious on their own.
**As mentioned, Pamela’s Products donated the bag of flour used in this recipe. In addition, the cookbook was a gift to me years ago. I was not paid or compensated in any way for this post. All thoughts and opinions are my own.**
I simply cannot buy another flour. No more room! Is there another flour that is similar in make up to Pamela’s? I have Better Batter, Cup 4 Cup, Bob’s Red Mill in both variations, King Arthur Measure for Measure. Like I said, that’s it for room. And that’s not to mention all the individual types of nut flours and others. I would like to make these, and I hate to experiment as that can be rather pricey. Thank you! Sorry to be a pain.