Gluten Free Butternut Squash Lasagna for Two
As an Amazon Associate and member of other affiliate programs, I earn from qualifying purchases.
While technically called a “for two” recipe, this gluten free butternut squash lasagna could serve more. The blend of butternut squash with thyme and sage create a taste sensation that will leave you dreaming of Thanksgiving.
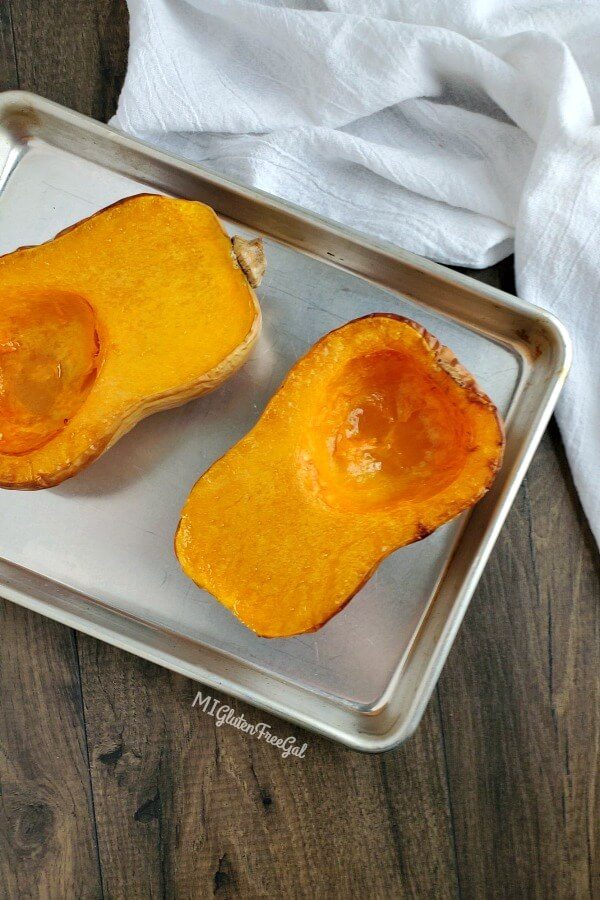
How to Roast a Butternut Squash
I find it hard to believe I hated butternut squash as a child. I could now eat it every day. There’s a natural sweetness that doesn’t require extra sugar. It’s like nature’s candy, but loaded with vitamin A. My husband’s grandmother cooked hers with orange juice, but I don’t think it’s necessary.
For this recipe, choose a medium to large sized butternut squash. Cut the squash down the middle, and spray with a bit of cooking oil. This prevents it from burning. Sprinkle it with a bit of salt, for flavor. Roast in a 350 degree oven for up to 45 minutes. You want to make sure it’s fairly tender so it purees easily.
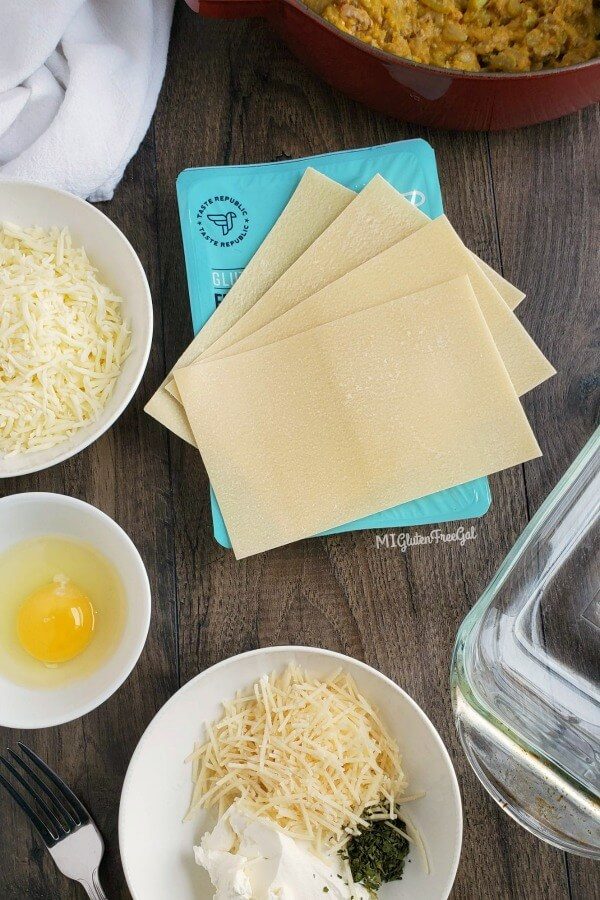
Taste Republic Gluten Free Fresh Lasagna Noodles
I originally created this gluten free butternut squash lasagna in 2016. At that time, these noodles were under the brand name “RP’s Pasta.” RP’s Pasta still exists, but now their gluten free line of fresh pasta goes by”Taste Republic.” Their non-gmo product line includes fettuccine (hello, Trader Joe’s), cheese filled tortelloni & new grain free pastas.
Each package of Taste Republic gluten free fresh lasagna contains 12 sheets. The sheets measure 6 1/2 inches long and 4 inches wide. Ingredients includes “brown rice flour, water, tapioca starch, potato starch, whole egg, egg white, xanthan gum, salt, and glucone-delta-lactone.” GDL is a “natural acidifier found in wine and honey.”
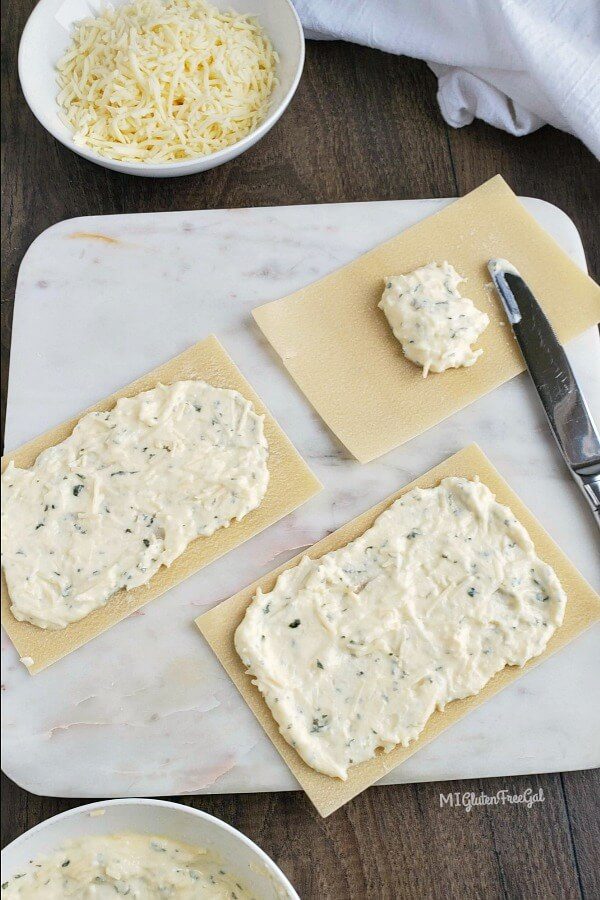
Best Tip For Making Lasagna Prep Easier
I read a tip online for making lasagna that was a game changer. Not sure where, so I can’t credit the genius. Layout your NO BOIL gluten free lasagna noodles on a flat surface. Then, portion your ricotta mixture evenly between the noodles, and spread it out. It makes it so much easier to build your lasagna.
Often people ask about dairy free or egg free options. The noodles contain eggs, and the ricotta mixture contains egg & dairy. Barilla makes no boil gluten free lasagne sheets which contain no eggs or dairy. They might work in this gluten free butternut squash lasagna, but I haven’t tried it. This Healthy Vegan Lasagna from Fit Foodie Nutter could work well with the Barilla noodles.
Assembling Your Gluten Free Butternut Squash Lasagna
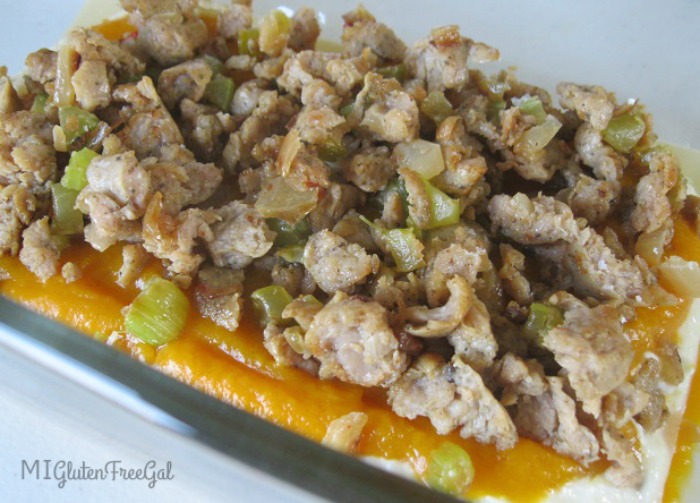
Before laying the first noodle in a loaf pan, coat the bottom of the pan with 1/4 cup of pureed butternut squash. The butternut squash is thinned with a chicken broth, which adds depth of flavor. I tend to keep my squash and meat mixture separate, but you could combine them after this step if you’d like.
Place on ricotta coated noodle on top of that first bit of sauce. Next I put a 1/2 cup of squash and 1/3 cup of the meat mixture. On top of that I add 1/3 cup of mozzarella cheese. Repeat the layering process with the other two noodles. After baking it in the oven, it will look a bit soupy around the edges, but it will set up beautifully after 15 minutes.
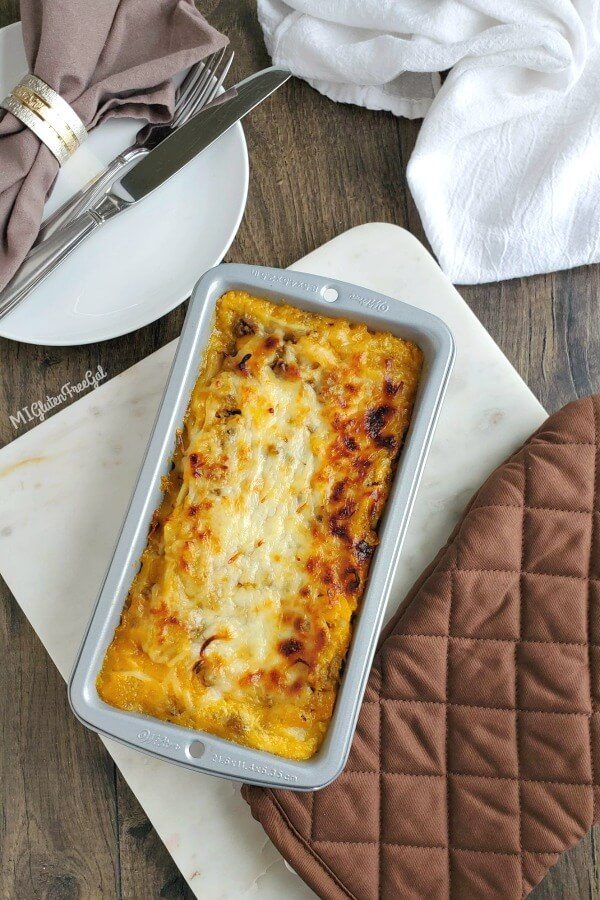
Which Size Loaf Pan Should I Use?
This gluten free butternut squash lasagna evolved from a Lasagna for Two by Julie Yoon. I love watching her “how to” video on her website. I created this dish after first trying to use the Taste Republic lasagna noodles to make butternut squash ravioli. Yeah, that was an epic fail.
However, this lasagna tastes a million time better, IMO. I added finely chopped celery to the dish, as well as sage and thyme. Prepared with ground turkey, this lasagna tastes like Thanksgiving dinner, all in one pan. I first made this in a standard 9 x 5 pan. However, I found the 8 x 4 loaf pan I used for my buckwheat bread to work better.
Other Butternut Squash Recipes
Even though this gluten-free butternut squash lasagna is meant for two, we often cut it into three slices. This way my husband can have leftovers in his lunch the next day. Because it’s small, this is the perfect dish to take to a family Thanksgiving gathering. And no need to share. 😉
Looking to use up the rest of your squash? Try Eat At Our Table’s Gluten-Free Butternut Squash Macaroni and Cheese. Your kids wont’ know they’re eating vegetables! This Gluten Free Butternut Squash Banana Bread from Minimalist Baker sounds amazing too! And if you bake with coconut flour, these Butternut Squash Pecan Muffins from Gourmande in the Kitchen look delicious.
Gluten Free Butternut Squash Lasagna for Two
Ingredients
For the meat mixture
- 1 tbsp butter
- 1/2 onion finely chopped
- 1 rib celery finely chopped
- 1 tsp minced garlic 2 cloves
- 1 tsp salt
- 1/2 tsp thyme
- 1/2 tsp sage
- 8 oz ground turkey
- 1/2 medium butternut squash roasted & pureed
- 3/4 c. chicken stock or broth
For the cheese filling
- 4 Taste Republic fresh gluten free lasagna noodles
- 1/2 c. ricotta cheese 4 oz
- 1/2 c. grated Parmesan
- 1 egg beaten
- 1/2 tsp dry parsley
- 1 1/3 c shredded mozzarella cheese
Instructions
- Preheat the oven to 350. If you have not already, bake your butternut squash in the oven. Depending on the size of your squash, this should take 35-40 minutes. Remove from the oven and allow it to cool enough so you can handle it.
- While the squash is cooking, prepare the ingredients for the meat mixture. In an iron skillet or dutch oven, melt 1 tbsp butter. To that, add onion and celery and saute until soft. This should take approximately 5 minutes.
- To the pan, add the garlic, salt, sage and thyme. Cook for 30 seconds.
- Finally, add the ground turkey and cook until the pink is almost gone. Try not to overcook it though, as turkey is very lean and we don't want it to dry out. If there's a touch of pink, it's okay, as we'll be baking this for almost an hour. When finished, turn off the skillet and remove from heat. Set aside.
- Next, mix the ingredients for the ricotta mixture. In a small bowl, combine the ricotta, grated Parmesan, egg and dry parsley. Mix with a fork or spoon until thoroughly combined.
- Wait to move on to the final steps until your butternut squash is completely roasted and cool enough to handle. When it's cool enough to handle, scoop out the roasted squash into a food processor. Puree. When mostly smooth, add the chicken stock and puree until completely smooth. When you're finished, you should have approximately 2 1/4 cups of squash puree.
- Preheat the oven to 350 degrees, if it's not already on.
- On a flat, clean surface, lay out 3 of the 4 lasagna noodles. Separate the filling between the 3 noodles, and spread it out over the noodles.
- In the bottom of a 8×4 (or 9×5) loaf pan, spread out 1/4 cup of the pureed butternut squash.
- Next, place one of the cheese lined noodles into the bottom of the pan. Top with 1/3 cup of the cooked meat, 1/2 cup of the pureed squash, and 1/3 c of mozzarella cheese.
- Repeat twice, using the remaining cheese covered noodles. (You will have one plain noodle left.)
- Place the remaining plain noodle on top, and gently press down to make sure the lasagna filling spreads out into the pan.
- Top with the remaining meat, squash, and mozzarella cheese.
- Spray a piece of aluminum foil with cooking spray. Place the sprayed side on top of the final cheese layer, and crimp the edges of the aluminum around the pain to seal. (The spray prevents the cheese from sticking to the foil.)
- Bake in a 350 degree preheated oven, covered, for 30 minutes.
- After 30 minutes, remove foil from the pan and continue to cook for another 15 minutes. If you'd like your cheese on top to be toasty, place under the broiler for up to 2 minutes.
- Allow lasagna to rest for 15 minutes before serving. This allows the noodles to absorb any residual moisture.
- **This recipe may work with Barilla gluten free lasagna noodles, but I have not tried it.
What creative ways do you use Thanksgiving leftovers? Have you created an amazing gluten-free dish after fixing a recipe mishap? Leave me a note below and we can learn from each other!
**In my first attempt in 2016, RP Pasta provided pasta for this post. I was not otherwise paid or compensated for my time. This post does contain affiliate links. Purchases made through those links help support this blog with no extra expense to you. Thank you for your continued support!**
Looks really good! Love when a fail becomes a plus, even better a favorite!
This recipe may be the exact reason I’ve gained weight recently. #addictive
This lasagna is outstanding! Always one of my favorite go-to fall recipes. The flavors are wonderful together.